Each Yondr pouch has a number written on the front, known as the Pouch Number, to identify the pouch. Each student is assigned a Yondr pouch.
Student assignments for Yondr pouches are stored in the following SharePoint list: Yondr - Assignments - All Items
List Views
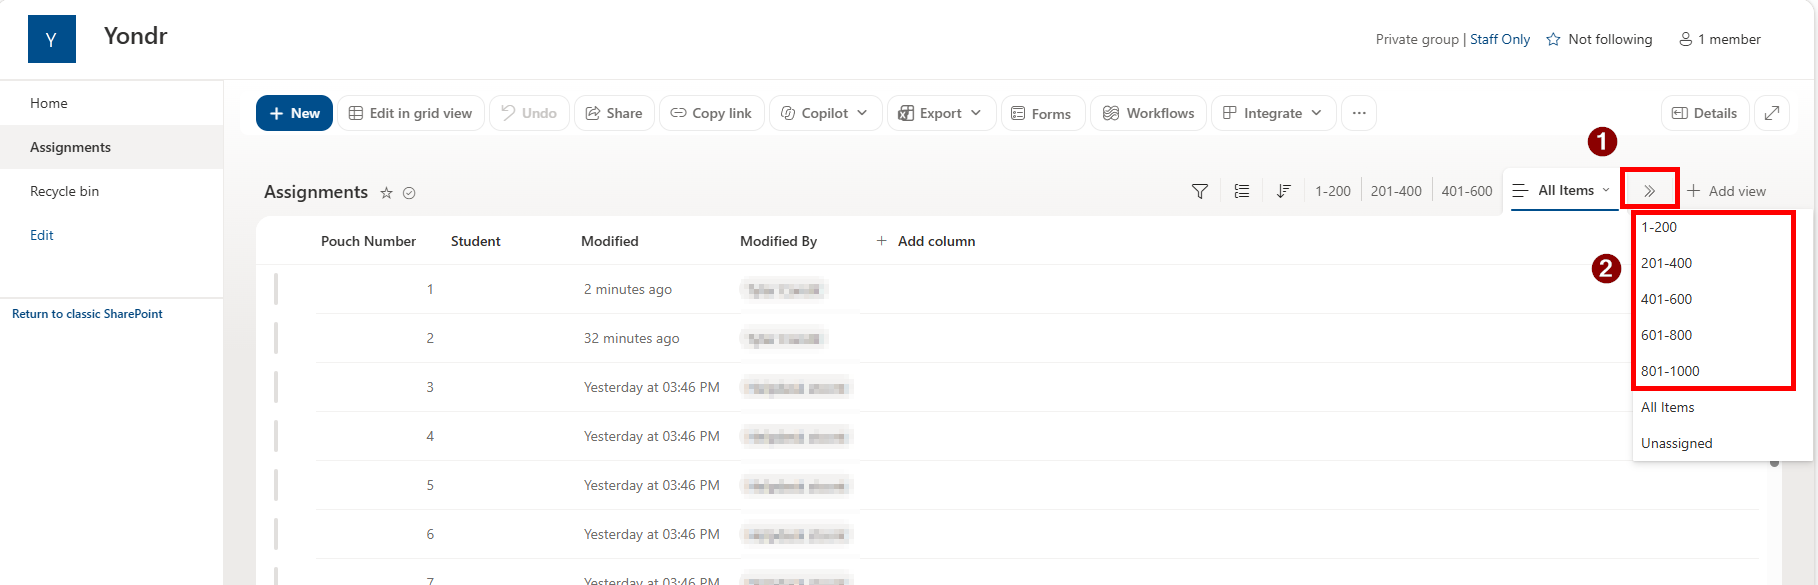
To help with usability, views have been made to represent blocks of 200 pouches. You can see these by clicking the More views button as shown below:
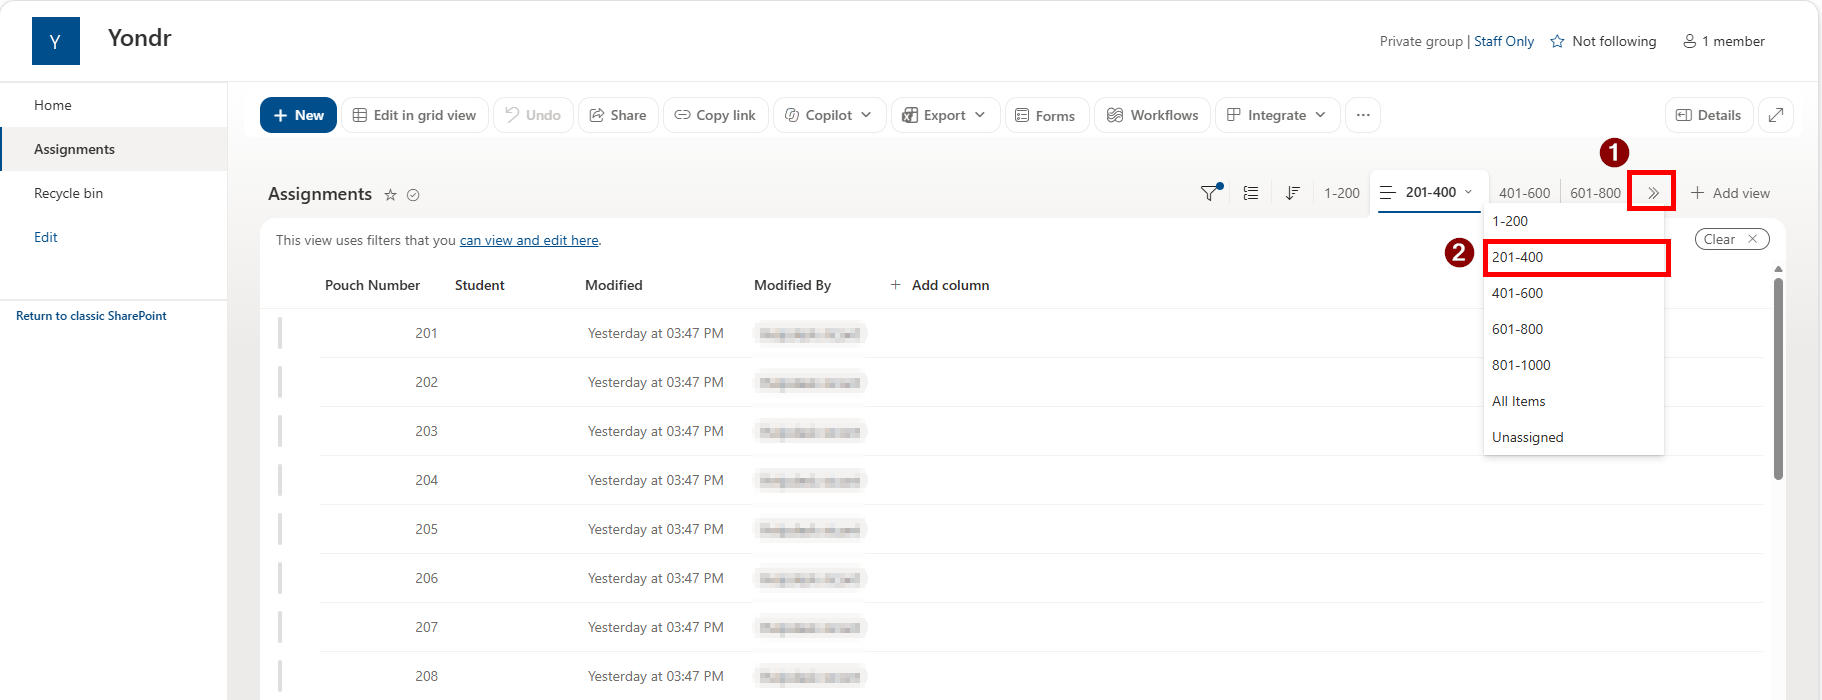
For example, if your PCG's year group has been assigned the 201-400 block of pouches, you can click on the 201-400 list view to only see pouches in that range:
Additional Views
There is a view called Unassigned which shows all pouches that are not current assigned to a student.
There is a view called Velcro Pouches which contains the Velcro pouches for students who require them.
How to assign a Yondr Pouch to a Student
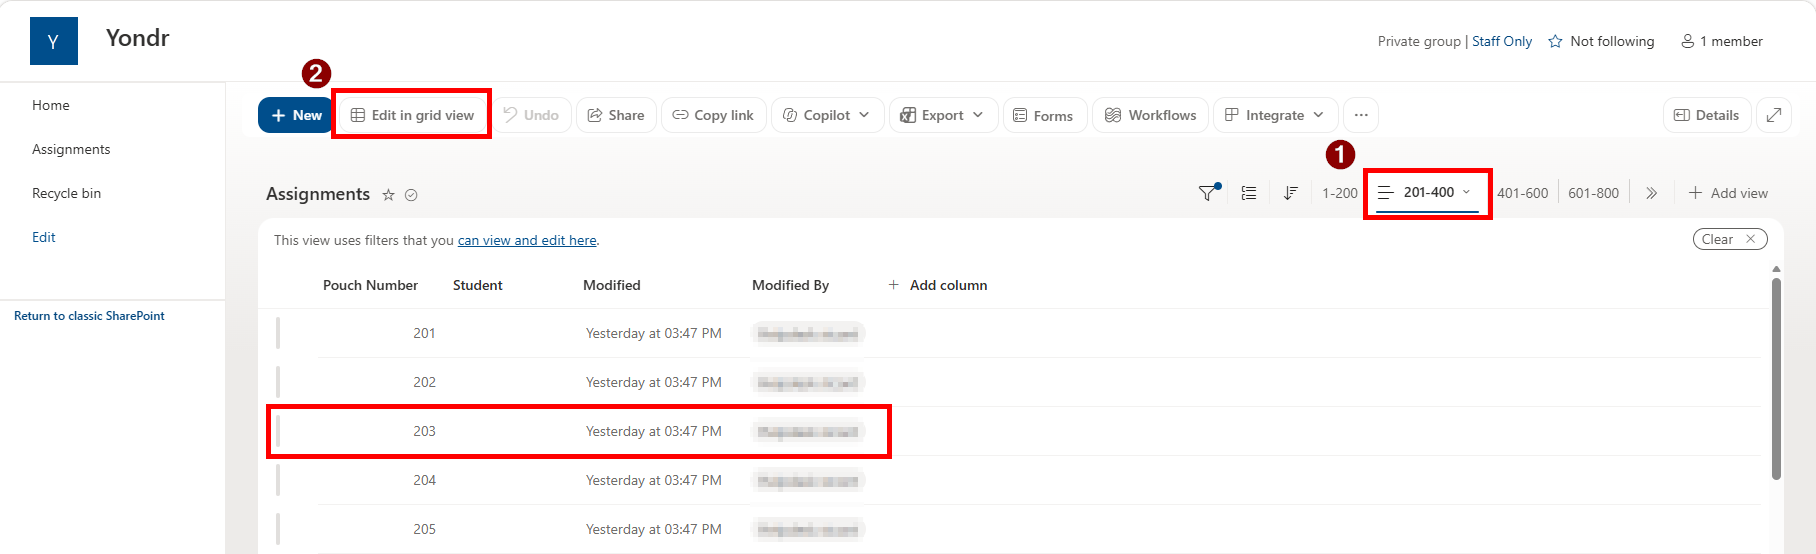
1. Using the relevant view from above, navigate to the Pouch Number that has been given to the student. In this example we will use Pouch Number 203. Then select the Edit in grid view option at the top of the list.
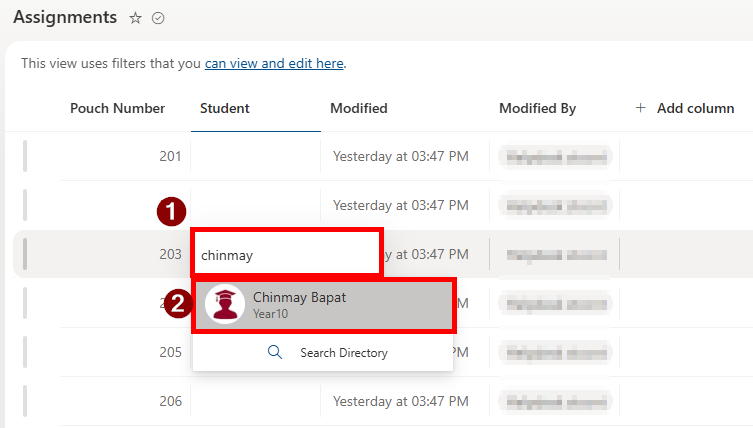
2. Double click on the cell in the Student column and enter in the name of the student you are assigning the pouch to, then select the student's name when it appears.
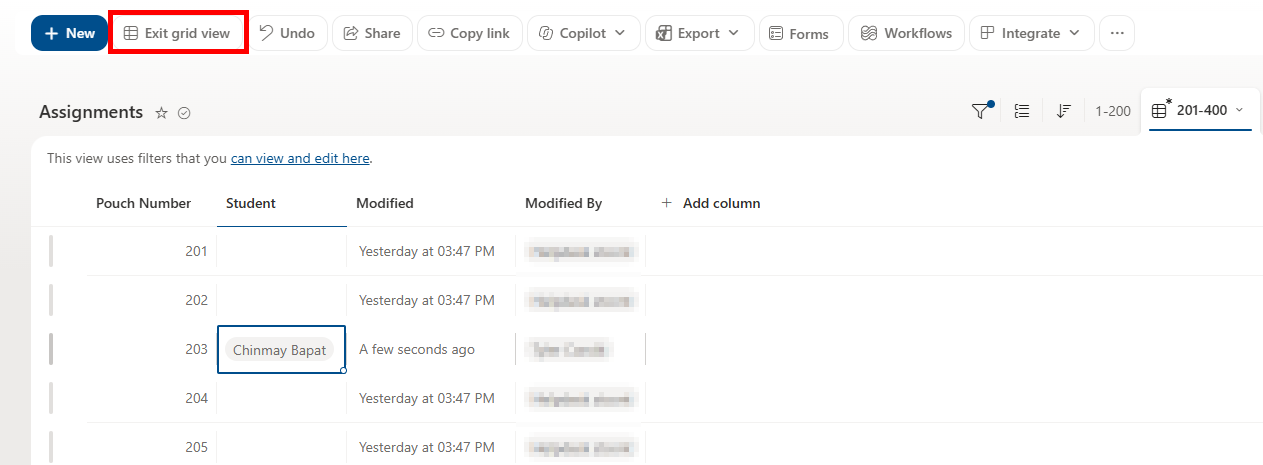
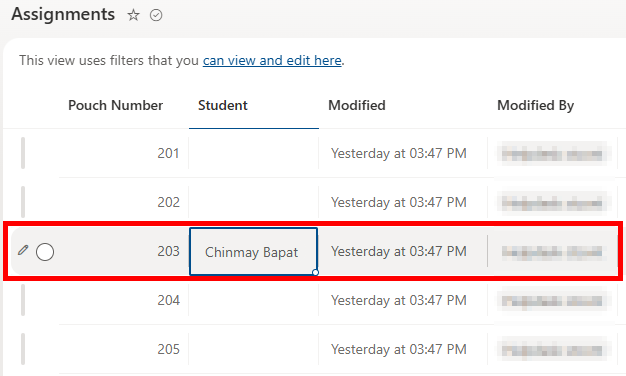
The student should now be selected in the list:
3. Continue this process for each student who is assigned a Yondr pouch. Once done, select Exit grid view at the top of the list.